> For the complete documentation index, see [llms.txt](https://read.cryptograb.wiki/cryptograb-automatic-affiliate/llms.txt). Markdown versions of documentation pages are available by appending `.md` to page URLs; this page is available as [Markdown](https://read.cryptograb.wiki/cryptograb-automatic-affiliate/cex-exchange-5-design-or-seed-or-visa-and-ms-9-merch-zh/guan-yu-wo-men/mian-fei-zhi-zuo-deepfake-tiktok.md).
# 免费制作 DeepFake TikTok
**开始**
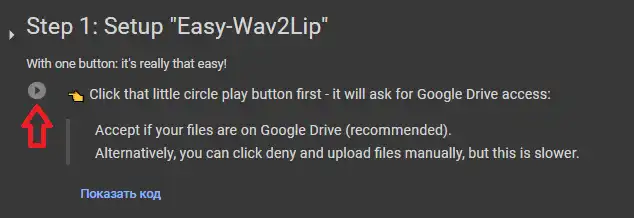
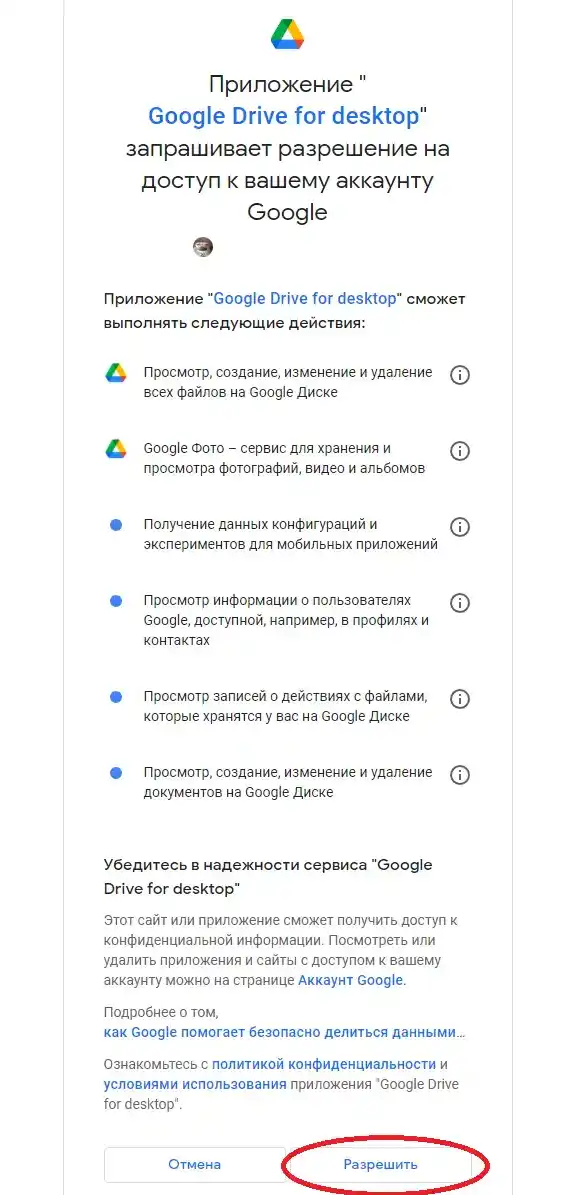
点击 [链接](https://zelenka.guru/proxy.php?link=https%3A%2F%2Fcolab.research.google.com%2Fgithub%2Fanothermartz%2FEasy-Wav2Lip%2Fblob%2Fv8.1%2FEasy_Wav2Lip_v8.1.ipynb\&hash=b2733046ff223e41c9ae97f21890c343) 并在右上角点击“连接”。
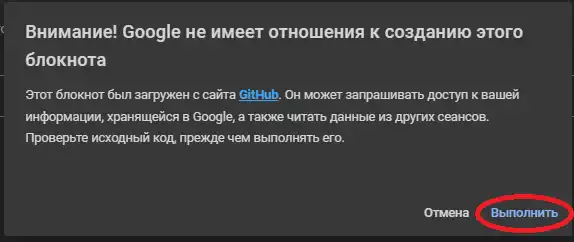
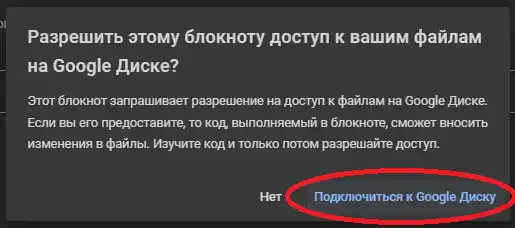
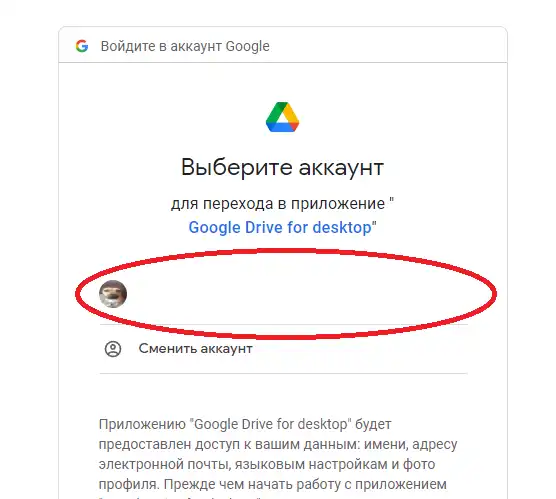
在为你分配到显卡后,开始第一段代码单元。点击此按钮,然后按照截图操作。
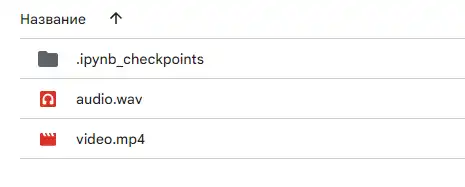
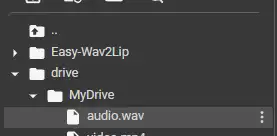
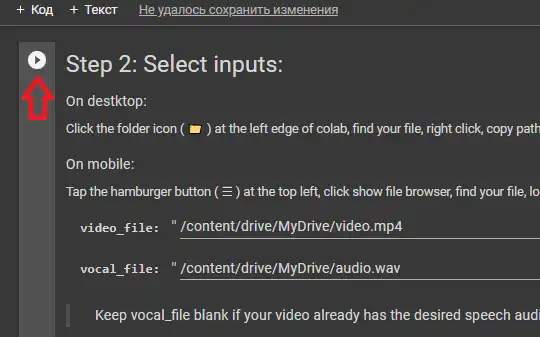
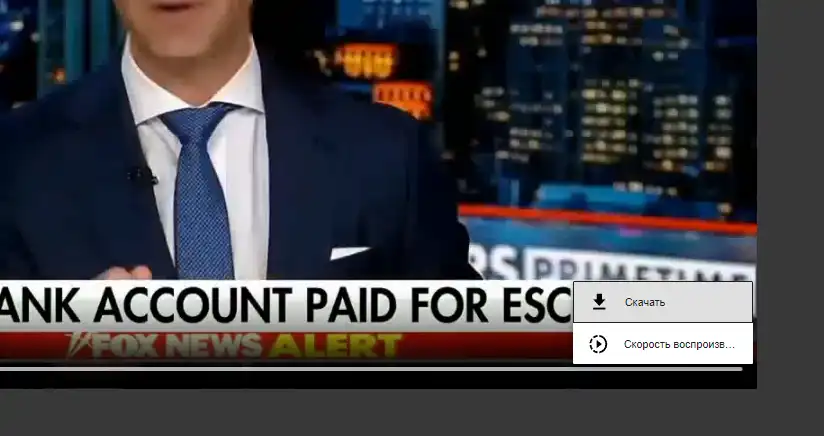
完成第2步后,开始添加素材,在我的例子中这是主播 FoxNews:
*
视频应为 .mp4 格式,音频为 .wav
一篇教你如何用所需声音生成文本转语音的文章
* [文章](https://zelenka.guru/threads/6282053/)
把你的素材上传到你在单元中挂载的 Google 云端硬盘。
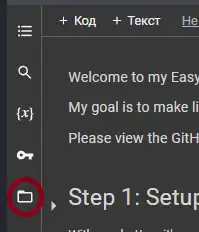
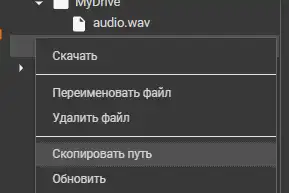
接着按照截图操作:
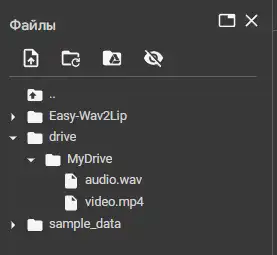
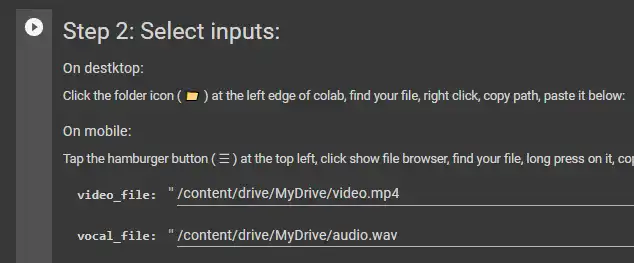
在单元中指定文件路径。
> **video - video\_file**
> **audio - vocal\_file**
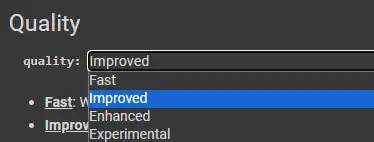
选择质量:
建议选择增强(Enhanced)。
选择神经网络的版本。
这个根据个人情况,建议对每个深度模型同时试两个版本,我推荐 Wav2Lip
它们之间的区别:
**Wav2Lip**
**优点:** 更精确的唇同步 + 在无声时会闭合嘴巴
**缺点:** 有时会导致缺少牙齿
**Wav2Lip\_GAN**
**优点:** 看起来更自然 + 保留说话者的原始表情
**缺点:** 唇同步不如前者精确 + 在无声时保持嘴巴与原始更相似。
开始生成深度换脸:
得到结果后检查是否有任何伪影。如果一切满意,下载生成的结果。
如果仍然存在伪影,特别是下巴问题,例如可见一条生成动作时的边框线,按我下面做的操作。转到这些滑块:
将 D 滑块设为 5-10 并查看结果。此操作相当于在面部下方添加了额外像素,这些像素也会被神经网络生成,
> R - 右
> L - 左
> U - 上
> D - 下
你可以调整这些设置,如果人的头型奇怪也能起作用。质量主要取决于你选择的原始视频。应选择人物尽量直视镜头,且不要跳动或抖动的视频。
我得到的结果:
*
**就这些。祝你好运!**
---
# Agent Instructions
This documentation is published with GitBook. GitBook is the documentation platform designed so that both humans and AI agents can read, navigate, and reason over technical content effectively. Learn more at gitbook.com.
## Querying This Documentation
If you need additional information that is not directly available in this page, you can query the documentation dynamically by asking a question.
Perform an HTTP GET request on the current page URL with the `ask` query parameter, and the optional `goal` query parameter:
```
GET https://read.cryptograb.wiki/cryptograb-automatic-affiliate/cex-exchange-5-design-or-seed-or-visa-and-ms-9-merch-zh/guan-yu-wo-men/mian-fei-zhi-zuo-deepfake-tiktok.md?ask=&goal=
```
`ask` is the immediate question: it should be specific, self-contained, and written in natural language.
`goal` is optional and describes the broader end goal you are ultimately trying to accomplish on behalf of the user. GitBook uses it to tailor the answer towards what is most useful for that goal.
The response will contain a direct answer to the question and relevant excerpts and sources from the documentation.
Use this mechanism when the answer is not explicitly present in the current page, you need clarification or additional context, or you want to retrieve related documentation sections.